


 Instruction Set
 RDBox Infrared + Relay IoT
1. Firmware selection options
2. Hardware setup
3. Provisioning your solution

Step 1: Firmware selection options
1. Ready made box. Click here to order a ready made box.
(with this option just need to jump to step 3)

2. Do it yourself .Click here to download the firmware for RDBox Infrared + Relay IoT
Once downloaded upload the firmware in the ESP 01. Click here for instructions


Step 2: Hardware setup
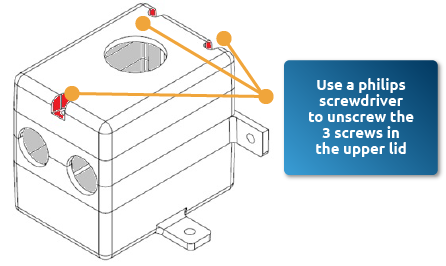
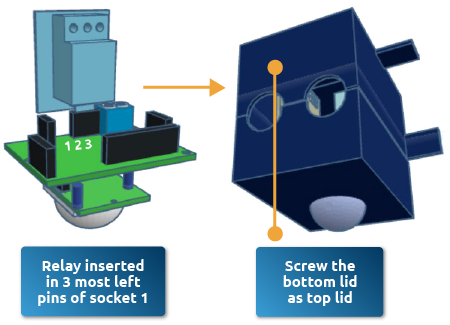
1. Unscrew the empty RDBox
2. Insert Infrared sensor in socket 3
3. Fix the Backplane board with only 2 frontal screws
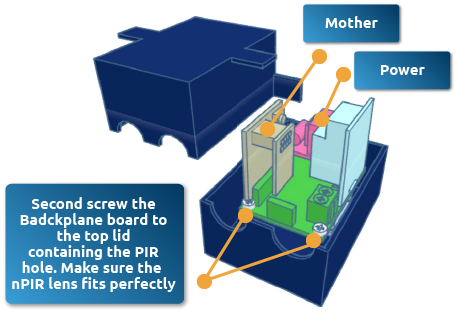
4. Plug in the Power board in its specific socket
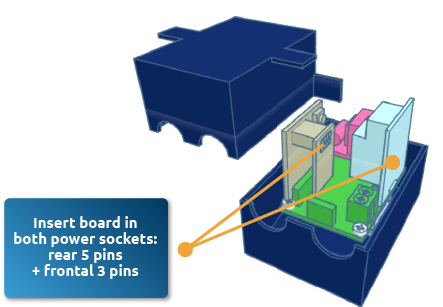
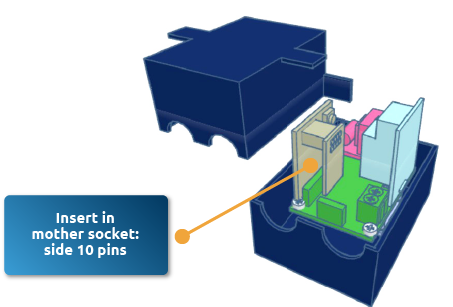
5. Plug in the Mother board in its specific socket
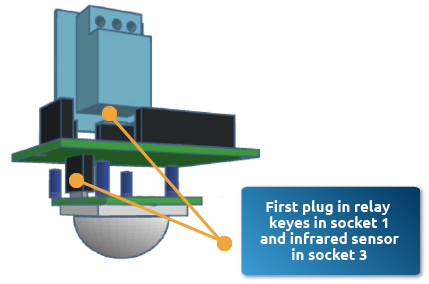
6. Plug in relay keyes in socket 1 and infrared sensor in socket 3
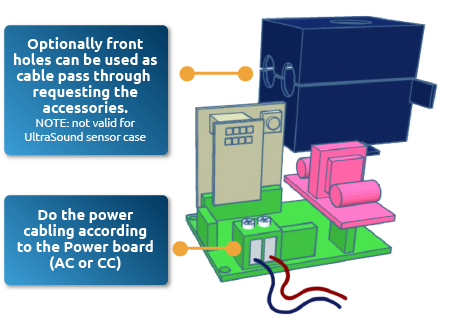
7. Connect the terminals according to your solution design
Step 3: Provisioning your solution